I’m a sentimental mom, and I am known for hanging on to every bit of art that Alivia brings home from school, even if it is just a scribble on a piece of construction paper. As she gets older and the bin gets fuller and fuller, I realized that I am going to eventually have to part with some of these one of a kind masterpieces. Instead of mourning pieces, I decided to create some DIY, one of a kind wall art projects that we would always hang on to!
This project was not only easy, but extremely cost effective. I was able to get most of the supplies at the dollar store though they would be readily available at any craft store.
To get started, you’ll need:
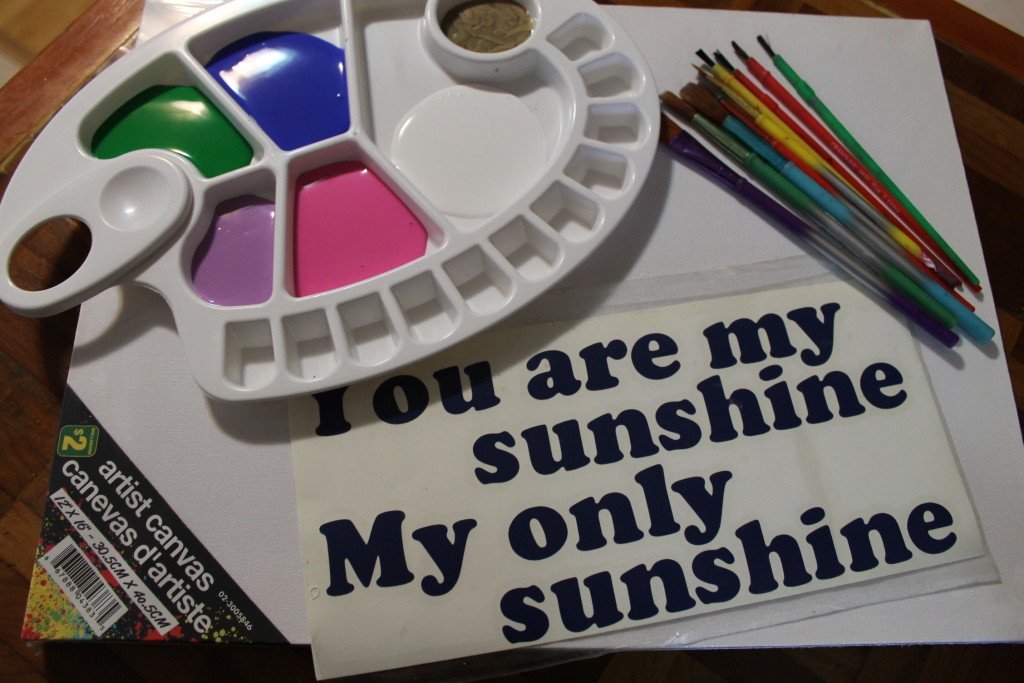
Art canvas – whatever size you’d like your final product to be, we used 12×16 so we could display them side by side
Paint – A selection of complementing paint colors, I did find that Crayola washable paint tubs worked best for color blending
Brushes – A selection of different sized paint brushes and sponges
Vinyl lettering – The vinyl quote, pattern or picture you’d like on the canvas, you can purchase vinyl lettering pre-made with a quote you’d like through a few local companies, or use ones you find at the dollar store.

Get started:
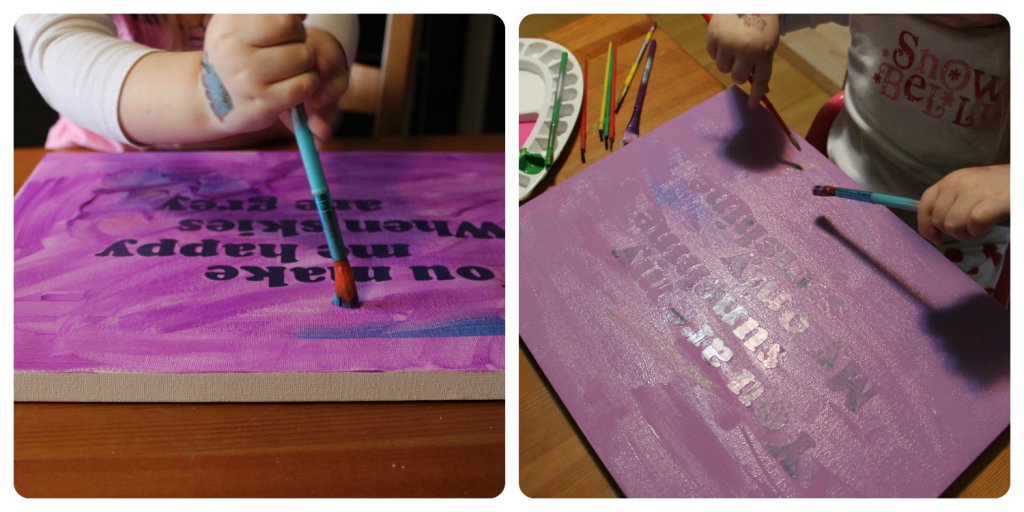
– Start by deciding the location of your phrase/cut out on your canvas and lay down your vinyl letters. If you are using dollar store letters you can place them one by one, if you had vinyl phrases printed like I did, you’ll need a bit more patience. Dollar store canvases aren’t as smooth as professional ones so I did have a bit of trouble with the vinyl letters sticking while I was peeling back the plastic, just be patient and take it slow, if they don’t end up where you’d like them, peel off carefully and re-position. Also, with dollar store canvases you may get small bleeds under the letters, we didn’t mind this and felt it added to the character.
– Get your colors ready, we found that Crayola washable paint tubs worked best for blending and being able to remove the letters, but you can definitely use the dollar store latex paint as well, we used what we had on hand! We did one canvas with each type of paint and love both.
– If you have a younger child, we recommend covering the canvas in a solid color roughly for them, it’s up to you if you’d like to paint the edges, it does give it a nice finish! If your child is older, you can get away with just letting them start painting at this point.
– Once they are done painting, set the canvas aside to dry for a minimum of 24 hours. Don’t be tempted to peel the letters off too early or you might lift/peel the paint back.
– When you are ready to remove the letters, use either an exacto knife or something with a flat edge you can use to work under the letter and carefully peel back. Don’t peel UP, try to peel back.
– Once you’d exposed your new masterpiece you can either spray with a sealant, or just hang on the wall!
– Repeat, as necessary to fill your wall with unforgettable art!
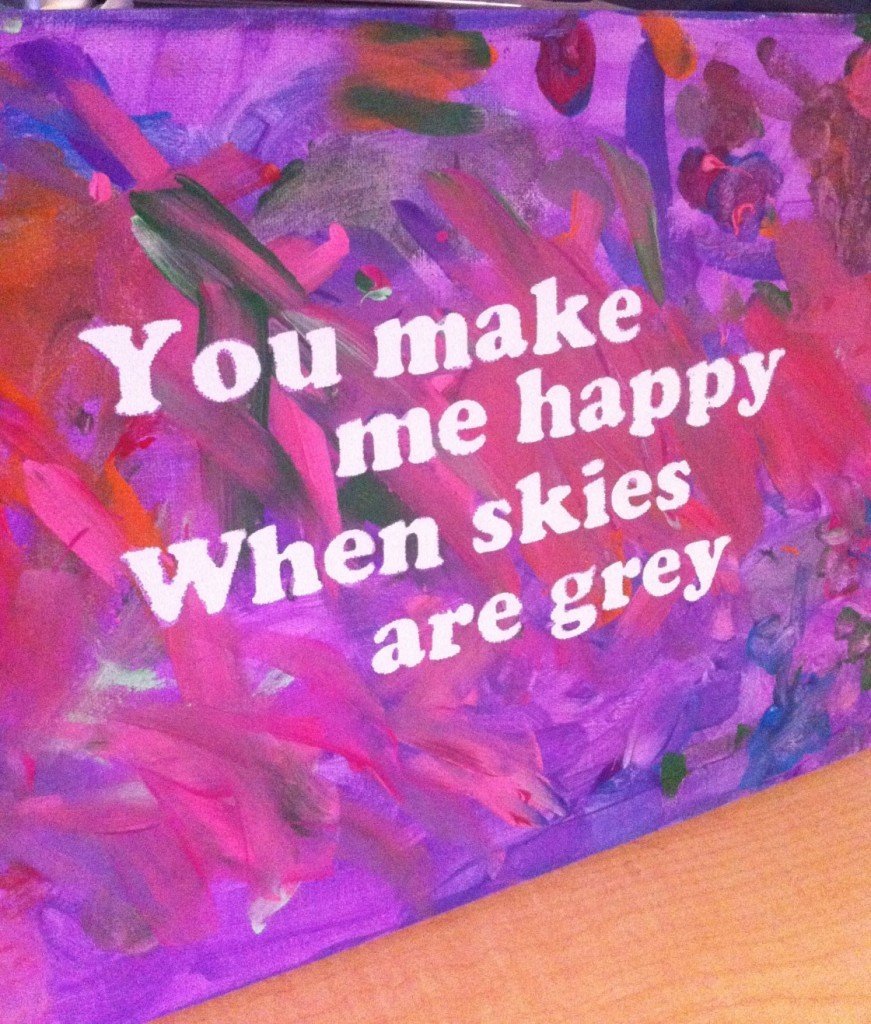
These canvases make a fantastic gift for parents, grand parents or care givers! Make sure to mark the back of the canvas with your child’s name and year made so you can reflect back on them as they get older.
Did you hold onto a special piece of artwork? Tell us about it!




Cute gift idea for the grandparents 🙂
I love this idea! thank you!
Other than the letters, we have those exact dollar store items sitting on our shelf waiting for something to happen lol. Love your creation! Thanks for the inspiration!
That’s a really cute idea! Love it!
My son and I did this yesterday. Turned out fantastic! thank you
this looks like a fun craft for kids at a camp too.
What a great idea!! Can’t wait to try it with my lil one!!
My girl made me the sweetest little canvas painting for Valentines day! I’d love a couple more to cover the wall by the stairs. Must stock up on those mini canvas’
I’m going to have to try this one, great idea.
Thanks for the great ideas !
Found some neat letter at the $store can’t wait to start
I haven’t made any but would love to make some
hey guys i manage to craft this and things wonderfully turned out to be good
Tthese ideas are fabulous